


Converting Android Native App to React-Native Compatibility
In this article we aim to overlay your existing Android application with a React Native layer.


First & foremost this blog is ideal for those with an existing Android application & a basic understanding of how to code in Android and how to use Android studio.
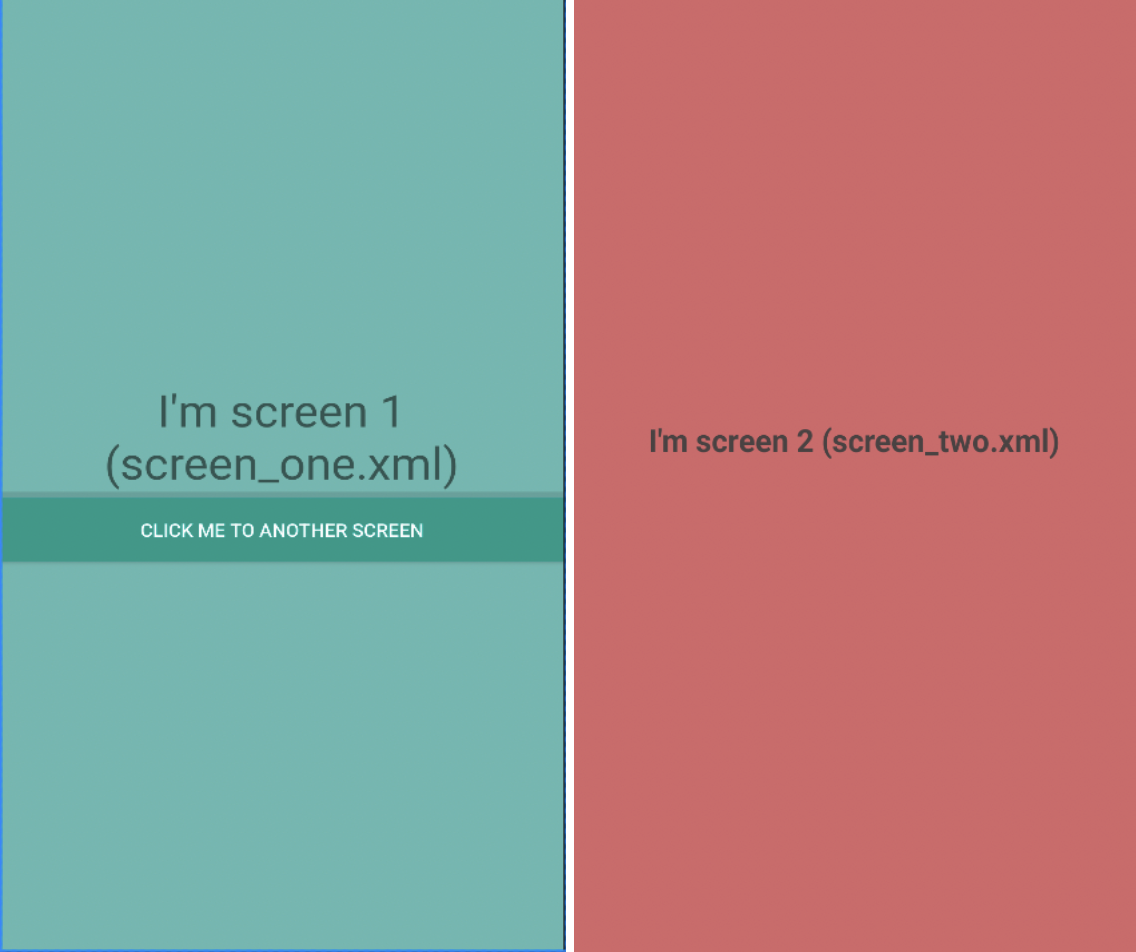
To begin with, two screens with a small application are created and shown below as an example:
Creation of AAR
Let’s perform below steps:
- Open your application in Android studio
- In build.gradle(:app) file
Example:
// change this line

plugins {
    id 'com.android.application'
}

// to this

plugins {
    id 'com.android.library'
}
- Delete the line for the applicationId in same build.gradle(:app) file
android {
    compileSdk 32

    defaultConfig {
        applicationId "com.project.example"     // remove this line
        minSdk 21
        targetSdk 32
        versionCode 1
        versionName "1.0"

        testInstrumentationRunner "androidx.test.runner.AndroidJUnitRunner"
    }
    ...
    ...

}
- Now sync the project with gradle
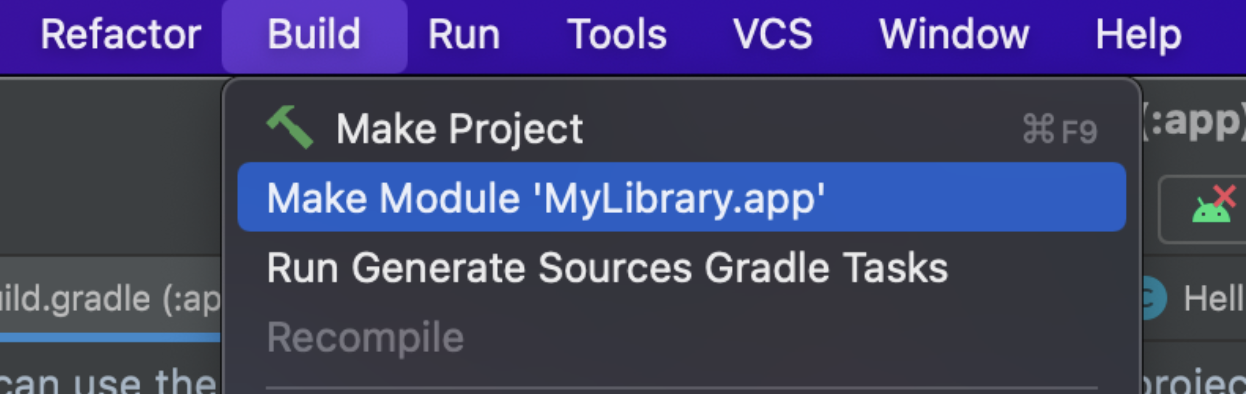
- To get the package i.e [Android Archive (AAR) .aar file] goto
Build -> Make Module ’YourAppName.app’ and click on it.
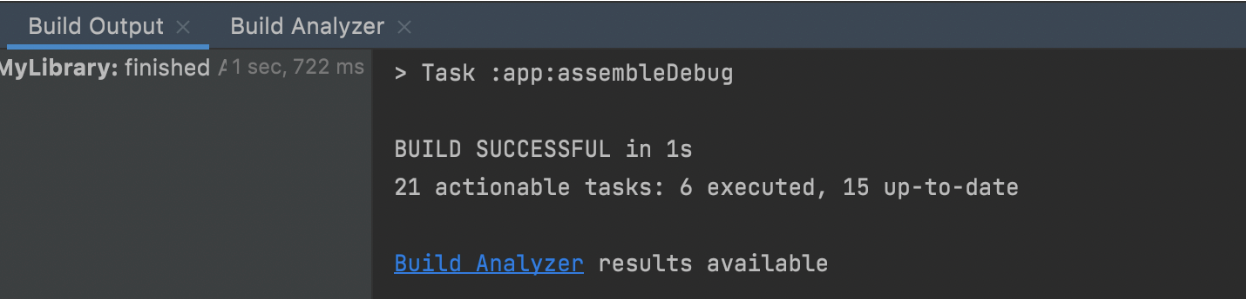
If everything works, then you will see BUILD SUCCESSFUL output in build output tab.
—--—--—--—--—--—--—--—--—--—--—--—--—--—--—--—--—--—--—--—--—--—--—--
You can find the your Android Archive (AAR) file at
app/build/outputs/aar/app-debug.aar
—--—--—--—--—--—--—--—--—--—--—--—--—--—--—--—--—--—--—--—--—--——--—-
Now we have successfully created the .aar file of our existing android application, now we are going to use this package in React Native application.
The reason we are doing this is: existing Android app can be used as a dependency in the new React Native application.
What this will do is:
- In case you modify your original Android application, you will just need to create AAR and use it as dependency in your RN wrapper modifying nothing (if your flow is intact)
- Creating logical differences between two entities or components will help developers to concentrate on either of them which can also result in efficient debugging.
Let’s begin the integration of AAR with RN
We must have an RN development environment to be set up in our machine. If you don’t have RN development environment you can follow this official Article
After RN CLI setup is done, you can use React Native's built-in command line interface to generate a new project. Let's create a new React Native project called
"RNAndroid":
npx react-native init RNAndroid
Now, You need to create a library folder inside the android folder and paste your .aar package file inside the library folder. Then, you have to put this package as a dependency to your RN application.
In build.gradle(:app) file i.e (/android/app/build.gradle)
implementation files("../library/mylib.aar")
dependencies {
    implementation fileTree(dir: "libs", include: ["*.jar"])

    implementation files("../library/mylib.aar")  // Add your package to dependency
    ...
}
If you have multiple .aar files you can add all the files like this
implementation fileTree(dir: "library", include: ["*.aar"])
So far we have added the Android Archive (AAR) to our React Native Android.
React Native Bridge For Android:
React Native is developed in such a way that we can create a bridge between the Native Language and the JavaScript code. A bridge is nothing but a way to set up communication between native platform(s) and Javascript.
But why do we need it?
Let’s assume you want to reuse some existing Java code or library without having to reimplement it in JavaScript. Yes, you guessed it right, you can use it in your React Native application with the help of Native Bridge. At some point of time, to make a production level application you will most probably need to use Native Bridge.
So in our case we want to use our mylib.aar library into our RN application, to use this library we need to use React Native Bridge, hence we need to create Native Modules.
Now, we will create the Android Native Modules that will allow you to access Android’s AAR from JavaScript.
Steps to create Android Native module in RN
I have an existing project named RNAndroid. I'll create a module named CustomModule.java inside the below directory.
android/app/src/main/java/com/rnandroid
package com.rnandroid;

import android.content.Context;
import android.content.Intent;
import android.provider.Settings;
import android.widget.Toast;

import androidx.annotation.NonNull;

import com.example.mylibrary.ScreenOneActivity;
import com.facebook.react.bridge.Promise;
import com.facebook.react.bridge.ReactApplicationContext;
import com.facebook.react.bridge.ReactContextBaseJavaModule;
import com.facebook.react.bridge.ReactMethod;

public class CustomModule extends ReactContextBaseJavaModule {
    private static ReactApplicationContext reactContext;
    Context context;

    CustomModule(ReactApplicationContext context) {
        super(context);
        reactContext = context;
        this.context = context.getApplicationContext(); // This is where you get the context
    }

    @NonNull
    @Override
    public String getName() {
        return "MyCustomModule";
    }

    @ReactMethod
    public void showToast() {
        Toast.makeText(reactContext, "Hi from Android!!!", Toast.LENGTH_LONG).show();
    }

    @ReactMethod
    public void callCustomLibraryScreen() {
        getCurrentActivity().runOnUiThread(
                new Runnable() {
                    @Override
                    public void run() {
                        Intent lIntent = new Intent(context, ScreenOneActivity.class);
                        lIntent.addFlags(Intent.FLAG_ACTIVITY_NEW_TASK);
                        context.startActivity(lIntent);
                    }
                });
    }

}
In the CustomModule.java file we have three methods.
getName(): This method returns the name of the module, which we are going to use in Javascript. My module name is MyCustomModule.
showToast(): This method has a special decorator attached to it i.e @ReactMethod which signifies that it is a callback method which can be invoked from the Javascript code. In this method we are showing a Toast message.
callCustomLibraryScreen(): In this method we are invoking the screen from the AAR library. As you can see we are using ScreenOneActivity class in line no 43 which is imported from “mylibrary” AAR.
Now we have to create a ReactPackage so that we can add our custom module inside the package.
package com.rnandroid;

import androidx.annotation.NonNull;

import com.facebook.react.ReactPackage;
import com.facebook.react.bridge.NativeModule;
import com.facebook.react.bridge.ReactApplicationContext;
import com.facebook.react.uimanager.ViewManager;

import java.util.ArrayList;
import java.util.Collections;
import java.util.List;

public class CustomModulePackage implements ReactPackage {
    @NonNull
    @Override
    public List createNativeModules(@NonNull ReactApplicationContext reactContext) {
        List modules = new ArrayList<>();
        modules.add(new CustomModule(reactContext));
        return modules;
    }

    @NonNull
    @Override
    public List createViewManagers(@NonNull ReactApplicationContext reactContext) {
        return Collections.emptyList();
    }
}
We have created a file named CustomModulePackage and implemented ReactPackage.
Inside this we have to override two methods named createNativeModules & createViewManagers.
We have added CustomModule in the createNativeModules() method and returned the list of modules.
- In the last step we have to add our CustomModulePackage file into the MainApplication packages list.
package com.rnandroid;

import androidx.annotation.NonNull;

import com.facebook.react.ReactPackage;
import com.facebook.react.bridge.NativeModule;
import com.facebook.react.bridge.ReactApplicationContext;
import com.facebook.react.uimanager.ViewManager;

import java.util.ArrayList;
import java.util.Collections;
import java.util.List;

public class CustomModulePackage implements ReactPackage {
    @NonNull
    @Override
    public List createNativeModules(@NonNull ReactApplicationContext reactContext) {
        List modules = new ArrayList<>();
        modules.add(new CustomModule(reactContext));
        return modules;
    }

    @NonNull
    @Override
    public List createViewManagers(@NonNull ReactApplicationContext reactContext) {
        return Collections.emptyList();
    }
}
We have created a file named CustomModulePackage and implemented ReactPackage.
Inside this we have to override two methods named createNativeModules & createViewManagers.
We have added CustomModule in the createNativeModules() method and returned the list of modules.
- In the last step we have to add our CustomModulePackage file into the MainApplication packages list.
package com.rnandroid;

import android.app.Application;
import android.content.Context;
import com.facebook.react.PackageList;
import com.facebook.react.ReactApplication;
import com.facebook.react.ReactInstanceManager;
import com.facebook.react.ReactNativeHost;
import com.facebook.react.ReactPackage;
import com.facebook.react.config.ReactFeatureFlags;
import com.facebook.soloader.SoLoader;
import com.rnandroid.newarchitecture.MainApplicationReactNativeHost;
import java.lang.reflect.InvocationTargetException;
import java.util.List;

public class MainApplication extends Application implements ReactApplication {

  private final ReactNativeHost mReactNativeHost =
      new ReactNativeHost(this) {
        @Override
        public boolean getUseDeveloperSupport() {
          return BuildConfig.DEBUG;
        }

        @Override
        protected List getPackages() {
          @SuppressWarnings("UnnecessaryLocalVariable")
          List packages = new PackageList(this).getPackages();
          // Packages that cannot be autolinked yet can be added manually here, for example:
          // packages.add(new MyReactNativePackage());
            packages.add(new CustomModulePackage());
            return packages;
        }

        @Override
        protected String getJSMainModuleName() {
          return "index";
        }
      };

  private final ReactNativeHost mNewArchitectureNativeHost =
      new MainApplicationReactNativeHost(this);

  @Override
  public ReactNativeHost getReactNativeHost() {
    if (BuildConfig.IS_NEW_ARCHITECTURE_ENABLED) {
      return mNewArchitectureNativeHost;
    } else {
      return mReactNativeHost;
    }
  }

  @Override
  public void onCreate() {
    super.onCreate();
    // If you opted-in for the New Architecture, we enable the TurboModule system
    ReactFeatureFlags.useTurboModules = BuildConfig.IS_NEW_ARCHITECTURE_ENABLED;
    SoLoader.init(this, /* native exopackage */ false);
    initializeFlipper(this, getReactNativeHost().getReactInstanceManager());
  }

  /**
   * Loads Flipper in React Native templates. Call this in the onCreate method with something like
   * initializeFlipper(this, getReactNativeHost().getReactInstanceManager());
   *
   * @param context
   * @param reactInstanceManager
   */
  private static void initializeFlipper(
      Context context, ReactInstanceManager reactInstanceManager) {
    if (BuildConfig.DEBUG) {
      try {
        /*
         We use reflection here to pick up the class that initializes Flipper,
        since Flipper library is not available in release mode
        */
        Class aClass = Class.forName("com.rnandroid.ReactNativeFlipper");
        aClass
            .getMethod("initializeFlipper", Context.class, ReactInstanceManager.class)
            .invoke(null, context, reactInstanceManager);
      } catch (ClassNotFoundException e) {
        e.printStackTrace();
      } catch (NoSuchMethodException e) {
        e.printStackTrace();
      } catch (IllegalAccessException e) {
        e.printStackTrace();
      } catch (InvocationTargetException e) {
        e.printStackTrace();
      }
    }
  }
}
Test What You Have Built
At this point, you have set up the basic scaffolding for your native module in Android. Test that out by accessing the native module and invoking its exported method in JavaScript.
In order to access your native module from JavaScript you need to first import NativeModules from React Native: You can then access the MyCustomModule native module off of NativeModules.
import {NativeModules} from 'react-native';

module.exports = NativeModules.MyCustomModule;
In our last step we will import the MyCustomModule in the App.js file and will call native functions.
We are calling showToast() to display the toast message and callCustomLibraryScreen() method to invoke AAR screens through the android native callback method.
import React, { useEffect } from 'react';
import { SafeAreaView, ScrollView, StatusBar, StyleSheet, Text, useColorScheme, View, Button } from 'react-native';
import { Colors, Header} from 'react-native/Libraries/NewAppScreen';

import MyCustomModule from './CustomModule';

const App = () => {

  MyCustomModule.showToast();

  const renderPakacageScreen = () => {
    MyCustomModule.callCustomLibraryScreen();
  }

  return (

               barStyle={'light-content'}
        backgroundColor={{backgroundColor: Colors.light}}
      />
               contentInsetAdjustmentBehavior="automatic"
        style={{backgroundColor: Colors.light}}>


                   style={{
            backgroundColor:  Colors.white,
          }}>

              style={{marginTop: 10, }}
          >
                           onPress={renderPakacageScreen}
              title="Render Native Package Screen"
            />


  );


};

/* $FlowFixMe[missing-local-annot] The type annotation(s) required by Flow's
 * LTI update could not be added via codemod */
const Section = ({children, title}) => {
  return (

               style={[
          styles.sectionTitle,
          {
            color: Colors.white,
          },
        ]}>
        {title}

               style={[
          styles.sectionDescription,
          {
            color: Colors.light,
          },
        ]}>
        {children}


  );
};

const styles = StyleSheet.create({
  sectionContainer: {
    marginTop: 32,
    paddingHorizontal: 24,
  },
  sectionTitle: {
    fontSize: 24,
    fontWeight: '600',
  },
  sectionDescription: {
    marginTop: 8,
    fontSize: 18,
    fontWeight: '400',
  },
  highlight: {
    fontWeight: '700',
  },
});

export default App;
Now run the React native app by using the following command:
aNote: Please make sure to open Android Emulator or connect a real Android Device to your laptop before you run that application.
react-native run-android
––––––––––––––––––––––––––––––––––––––––––––––––––––––––––––––––––––––
Visit below github page to view source code:
RNAndroid Repository Gitlab Link
MyLibrary Repository Gitlab Link
––––––––––––––––––––––––––––––––––––––––––––––––––––––––––––––––––––––




No Hype. Just Systems That Deliver Real Outcomes at Scale.


A1004, Amar Business Zone, Baner, Pune, Maharashtra – 411045


